

Your room and zones
Tempolight draws effects across your room, not along a strip: a wave travels from the left wall to the right one, a shockwave starts in the middle of the room, a drop lights the ceiling and the desk together. For that it needs to know where your lights are. The Room page (under Setup in the menu) is where you tell it.
flowchart LR
  A["Add lights on Devices"] --> B{"How do you want to place them?"}
  B -- "quick" --> C["Pick a preset: Start from a layout"]
  B -- "exact shape" --> D["Map with the camera"]
  B -- "by hand" --> E["Add and drag shapes"]
  C --> F["Fix LED ranges in Shapes"]
  D --> F
  E --> F
  F --> G["Identify each shape"]
  G --> H["Save room"]
  H --> I["Optional: zones"]
The picture at the top is a 16 × 9 view of one wall (and the ceiling edge). Coloured shapes are your lights: while you edit, each shape gets its own colour and the selected one is brighter; once saved, the picture shows the live show. Nothing changes on the real lights until you press Save room (Discard throws your changes away).
Start from a preset
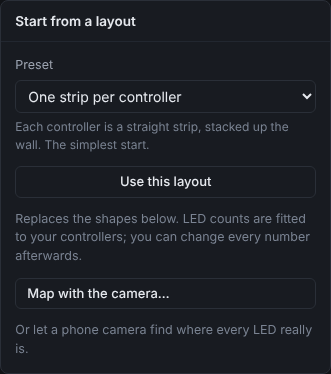
Start from a layout → Preset, then Use this layout. It replaces the current shapes, with LED counts fitted to your controllers.
| Preset | What it draws | Controllers it uses |
|---|---|---|
| One strip per controller | each controller a straight strip, stacked up the wall. The simplest start | any number |
| One strip around four walls | one strip split into left, back, right and front walls | 1 |
| TV backlight | a frame behind the TV, floor-lamp poles on a second controller | 1–2 |
| Gaming desk | ceiling cove, three monitors, desk edge, light bars and hexagon panels | 1–3 |
| Bedroom | ceiling strip, headboard frame, under-bed glow, bedside lamps, a moon ring | 1–2 |
| Living room | ceiling cove, TV frame, ring light, square frame, hexagons, poles, floor strip | 1–3 |
| LED matrix | a matrix panel (serpentine wiring), a floor strip and poles on a second controller | 1–2 |
| Club / stage | ceiling cove, six poles, two big rings, a triangle, a DJ booth front | 1–4 |
| Rings and panels | each controller a ring, in a row (light rings, round panels, fans) | any number |
With fewer controllers than a preset uses, its shapes share the controllers you have; with more, the extra ones get a strip along the floor, so nothing stays dark. Change any of it in the table.
The shape editor
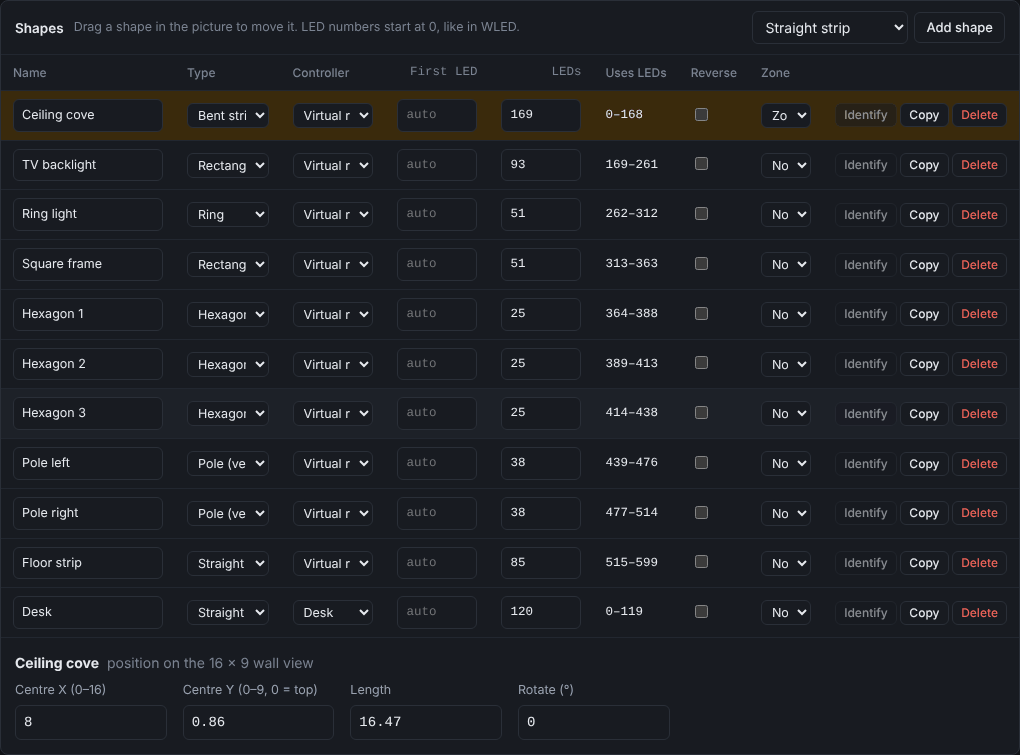
Each row of Shapes is one piece of your lights:
| Column | What it is |
|---|---|
| Name | anything, for example "Left wall" |
| Type | Straight strip, Pole (vertical), Bent strip, Ring, Rectangle / frame, Hexagon, Triangle, Matrix panel. Points are shapes made by camera mapping, Nanoleaf, Hue or Twinkly (one light at each point) |
| Controller | which device drives it |
| First LED | the first LED number of this shape on that controller, counting from 0 like WLED. Leave it on auto to continue after the previous shape on the same controller |
| LEDs | how many LEDs it has |
| Uses LEDs | the range it ends up using, for example 100–199 |
| Reverse | tick it if a chase runs the wrong way |
| Zone | which zone it belongs to |
Example: one 300-LED strip around a room: Left wall LEDs 0–99, Back wall 100–199, Right wall 200–299. Three rows, same controller, First LED on auto, 100 LEDs each.
- Move a shape: drag it in the picture. Select a row to change its size and position below the table: Centre X (0–16), Centre Y (0–9, 0 = top), Length / Width / Height / Radius, Rotate (°), Columns and Rows for a matrix, and LED 0 position (0–1 around) for rings and frames (where on the shape LED 0 is).
- Add a shape: pick the type next to Add shape and press it. Copy duplicates a row, Delete removes it.
- Check it: after saving, Identify lights one shape in white with LED 0 blinking, so you can see which shape is which and where it starts.
- Controllers (at the bottom) shows which LEDs each controller drives and warns when shapes overlap or a controller has fewer LEDs than its shapes use (uses 320 LEDs but the controller has 300). Send segments to WLED writes the ranges into WLED as segments.
Map with the camera
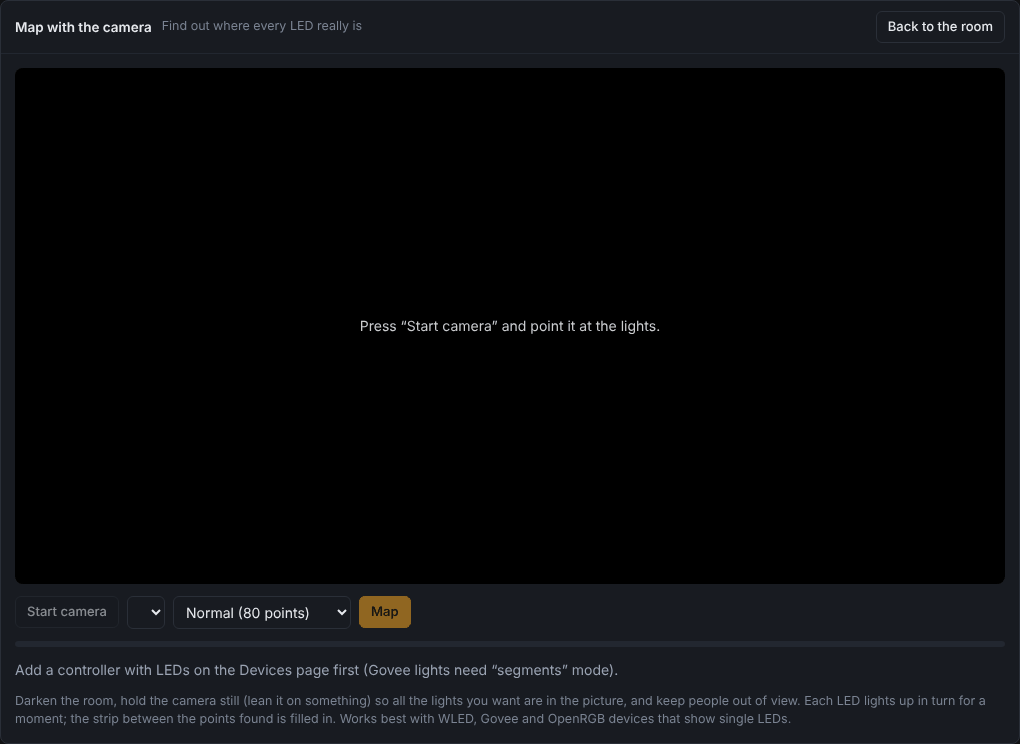
For strips that bend around furniture, trees or an odd-shaped room, a camera can find where every LED really is.
sequenceDiagram
  participant You
  participant Page as Camera mapping page
  participant Lights
  You->>Page: Start camera, pick the controller, Map
  Page->>Page: measures how slow the camera is
  loop for each point (40, 80 or 200)
    Page->>Lights: light one LED
    Page->>Page: find it in the picture
  end
  Page->>Page: fill in the LEDs between the points found
  You->>Page: Use this layout
Page->>Lights: the room shape is the real shape- Room → Map with the camera…
- Darken the room, lean the phone or laptop on something so it doesn't move, and get all the lights you want in the picture. Keep people out of view.
- Start camera, pick the controller, pick Quick (40 points), Normal (80 points) or Detailed (200 points), and press Map. Each LED lights up in turn for a moment.
- When it's done, Use this layout. Mirrors and reflections are skipped and missed points are filled in.
Camera on a phone: browsers only allow the camera on a secure page. http://192.168.1.20:8080 isn't one, so on a
phone you need Tempolight over https (a reverse proxy or tunnel with a certificate). A laptop's camera works with
Tempolight opened as http://localhost:8080 on that laptop. Works with WLED, Govee in segments mode and OpenRGB.
Zones

A zone is a group of shapes with its own rules. Examples: a TV zone that turns off during movies, a calm Ceiling while the desk parties, a Bedroom zone for the wake-up sunrise.
- Zones → Add zone (if a shape is selected, it joins the new zone).
- Name it and choose what it shows:
- Follows the main effect: like the rest of the room, with its own Brightness.
- Its own effect: pick the effect in the next column.
- The ambient light: the calm look from Settings → Lighting → When nothing plays.
- Off.
- Put shapes in the zone with the Zone column in Shapes, then Save room.
Zone settings apply straight away; shape membership applies when you save the room. Zones are also targets for other things: the game and OBS colours on the Integrations page, the wake-up sunrise, and lights that update slowly (give a Hue zone a calm effect while WLED strips run the drop).
Advanced
- The coordinate system is 16 units wide and 9 high,
y = 0at the top. Effects that go "floor to ceiling" usey; "left to right" usesx; "around" and "along" follow each shape's own LED order. - The room in the API:
GET /api/layout(every LED's position),PUT /api/room({shapes}),POST /api/room/preset({id}),PUT /api/zones; see api.md. - Backups (Settings → Backup) include the room and zones.